
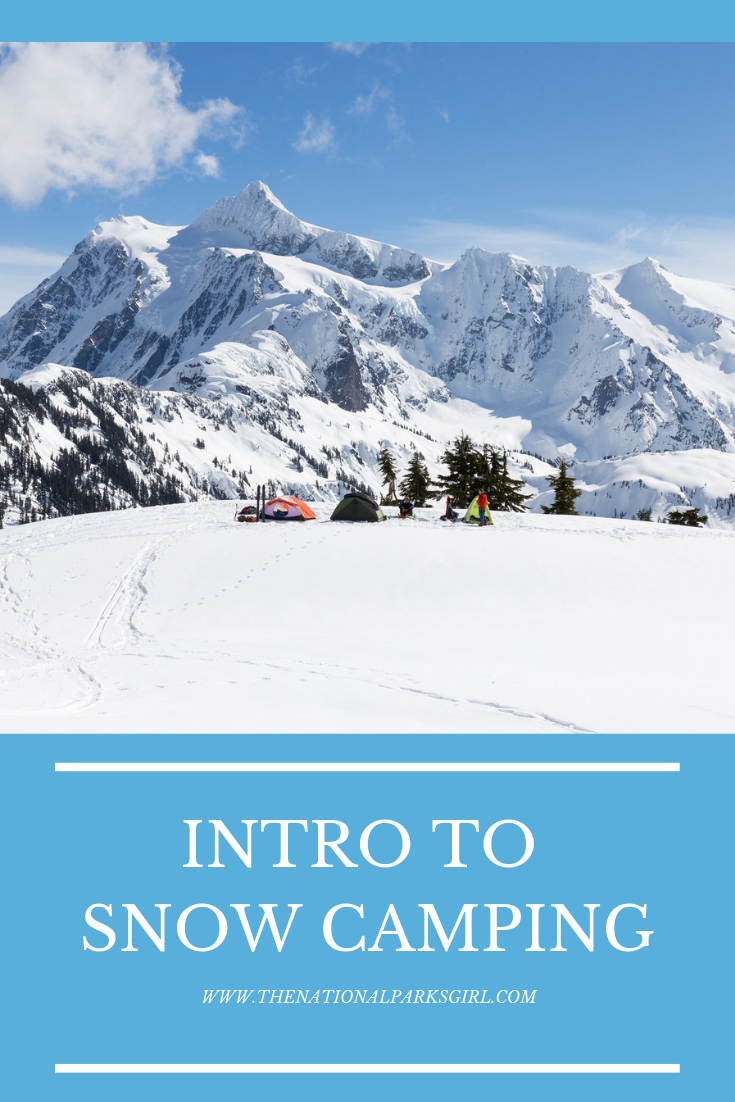
Backpacking 101: Snow Camping Guide

Just because the temperature drops and snow blankets the landscape doesn’t mean that the backpacking or camping season needs to end. Snow camping offers an entirely unique opportunity to experience the backcountry. Often times camping regulations are less stringent (once the snow reaches a depth of 5 feet tents no longer threaten fragile vegetation), the crowds diminish, and snow-capped mountains provide magical views. However, while it’s undoubtedly beautiful, there are also more risks involved in snow camping. Avalanches, hypothermia, and sudden winter storms are dangers that can quickly turn a routine outing into a fatal trip. Below are a few tips that will help you prepare for your first foray into winter camping. As always, if you have any questions or concerns please leave a comment or reach out to me directly using the contact form.

- GEAR -
While it is important to bring the proper gear whenever heading out into the backcountry it is perhaps even more crucial to bring the correct gear when winter camping, not just for comfort but for safety as well. It is also important to note that not all summer gear will be usable in the winter, for example water bladders freeze in the winter so you can keep those Camelbaks in storage until spring!

4-Season Tent or sturdy 3-season tent - While intuitively it would make sense that you must bring a 4-season tent if you go winter camping you can actually get away with a sturdy 3-season tent if weather conditions allow. Many 4-season tents are heavier; their poles are more substantial and their fabric is thicker because they are crafted to withstand high levels of wind and snow. So if I were going on a multi-day trek or snow is in the forecast I would bring our 4-season tent, however, if I’m only going out on an overnight trip and the low is in the teens, the wind is forecast to be 5mph, and there is zero snow in the forecast I would opt to take our 3-season tent.
0°F Degree Sleeping Bag - Sleeping bag that are rated to 15°F or lower are considered winter sleeping bags. I choose a 0°F bag because I run cold and it’s always easier to unzip a bag if I get too warm than it is to pile on more layers if the bag isn’t adequate, plus it is typical for a winter night to dip into the teens. When shopping for a bag the temperature rating at which the bag is named is considered its comfort level, that is the temperature at which an average “cold sleeper” will be able to sleep comfortably. You will also see limit temperatures. The upper limit is the highest temperature one can sleep in it and the lower limit is the lowest temperature one can sleep in the bag and survive through the night. It’s always a good idea to choose a bag with a comfort rating at a temperature lower than you are planning to camp in.
Sleeping bag liner - Sleeping bag liners are always a good idea. First, they can add up to 25°F, which can allow your sleeping bags to have more versatility. Second, they keep your sleeping bag cleaner. Instead of washing your sleeping bag often you can simply throw the liner in the wash, since that’s the only fabric your body touches.
Sleeping pads - Sleeping pads are good for two things: Cushion and insulation. In the winter having adequate insulation from the snowy, frozen ground is crucial. In the summer I use only an inflatable sleeping pad, but that’s not quite enough insulation for me in the winter so I use the Big Agnes Insulated Air Core Ultra sleeping pad on top of the Therm-a-rest Z lite to stay extra insulated during winter camping.
Wool base layer - Having a warm base layer is essential to staying comfortable in the backcountry. I always start out with Icebreaker 200 Oasis Half Zip. Merino wool is an extremely soft and lightweight fabric that dries quickly and can be worn on its own while snowshoeing up a mountain or combined with fleece and down jackets for extra warmth. These Smartwool tights are great for winter adventures as well, and they have pockets for storing a phone/chapstick/etc.
Wool socks (2 pairs) - These socks will keep your feet cozy while hiking and at camp. I always bring 2 pairs so I have a dry pair to change into once I get to camp.

Fleece layer - For extra warmth while hiking or just a mid-layer to wear around camp I always bring a heavy fleece jacket on winter trips. My personal favorite is the North Face Osito 2 jacket. It feels like wearing a blanket!
Down jacket - Another layer to help you retain heat in the winter is a down jacket. The thicker, the warmer! I bring the Columbia Heavenly jacket, which is a lightweight synthetic down with a thermo-reflective lining that helps trap heat in.
Waterproof Shell - In the winter it’s important to have an entirely waterproof, but breathable outer layer in case you experience any snow/rain/sleet, something made with Gore-tex is always a good bet. I use the Patagonia Powder Bowl Jacket.
Waterproof Pants - For the same reasons you need a waterproof layer for your top, you need a waterproof layer for your bottom as well. I like to wear these around camp as an extra defense against any wind and as an extra layer when sitting on rocks and/or snow. Note: I only wear these while hiking if snow is really coming down, if it’s not snowing they are stored in my backpack until I make it to camp (along with my waterproof shell, down jacket, and fleece jacket).
Down booties - These are my absolute favorite winter item! When I get to camp I immediately take off my hiking boots, change into a dry pair of socks, and put these cozy boots on. They are great for milling about camp. They keep my feet so warm and dry!
Knit Hat - A knit, wool hat is the perfect topper to keep your noggin warm at camp.
Gloves - I bring two pairs of gloves. A thick pair of ski gloves that I can wear around camp, like these Burton gloves, and a thin pair of fleece gloves that I can wear while working my camera, setting up the tent, or cooking dinner.
Snow gaiters - Snow gaiters are necessary for keeping snow out of your boots while you hike and they add a noticeable amount of warmth to your legs!
Waterproof hiking boots - While in the summer you can get away with trail runners or lightweight, low hiking boots, in the winter you should look for a pair of boots that are waterproof (because they will be getting very wet in the snow) and insulated so they can keep your feet extra warm.

Trekking poles with baskets - Trekking poles are useful year-round to take a little pressure of your legs and joints but in the winter you’ll need to make sure you add their snow baskets! If you don’t the poles will sink right into the snow and you won’t gain any leverage.
Microspikes - Microspikes are extremely helpful, and sometimes absolutely necessary, on icy sections of the trail. These fit on the outside of your hiking boots and are quick and easy to put on!
Snowshoes (or skis) - Once the snow pack reaches a certain depth (usually a foot of so, depending on how well traveled the trail is) you will need some sort of flotation to make sure you don’t posthole with every step you take.
Sunglasses - Snow is bright and reflective! Always make sure you bring sunglasses to protect your eyes, even if it’s an overcast day.
Stove - The best stoves for winter camping are liquid-fuel stoves because they run on white-gas and white-gas burns much more reliably in low temperatures. Canister stoves, while lightweight and convenient, are less reliable in low temperatures as the cold causes the cans to depressurize, producing a weak flame.
Nalgene bottles - Water bladders tend to freeze in the winter, so leave those at home and instead bring Nalgene bottles. As a plus, you can fill them with boiling water before bed and toss them in your sleeping bag for extra warmth!
Shovel - A shovel comes in handy to dig out/flatten a camp spot. We also use a shovel to dig out the “kitchen”, making a table and chairs.
Snow stakes - Regular camp stakes typically don’t work in the snow, so we bring these snow stakes. They’re much larger than regular stakes and their holes fill in with snow, helping to anchor them in and making it more difficult for them to pop out on their own.
Iodine tablets - A flowing water source often isn’t a reliable bet for water while winter camping. This means you will have to melt snow in your stove for water, this takes quite a bit of time and fuel. If you are going to rely on boiling snow for a water source I would recommend bringing extra fuel just in case. In addition to boiling the water, Iodine tablets can be an extra defense against giardia, viruses, and bacteria.
A note about gear cost.
Camping gear, and especially winter camping gear, is not cheap. But, there are a few places to find nice, used gear. REI Garage Sales are an excellent place to find lightly used gear for discounted prices, you can check out their site (HERE) to find the schedule for your local store. Other resources are: Outdoors Geek, Patagonia Worn Wear, Ebay, and Facebook Marketplace.

- AVALANCHES -
Quite possibly the most important investment you can make before heading out into the backcountry in the winter is an avalanche course. If you are going to be heading out into avalanche terrain, that is slopes that are between 30 and 45 degrees, you should consider taking an AIARE 1 course. Know Before You Go and the Utah Avalanche Center offer free online, interactive Avalanche courses HERE, NWAC also offers avalanche courses for snowshoers and many of them are free (you can see the schedule HERE) and finally, YouTube videos can also be very informative.
In addition to taking a class, you should regularly check Avalanche.org to stay informed on any avalanche problems and forecasts.

- TRIP PLANNING -
Trip planning for a winter trek is a little different than planning for a summer trip. Trails are relatively easy to follow in the summer (although you should always bring a map in the summer as well!), you just go where the trail goes. However, in the winter trails disappear. There may be some trails with blazes and often times the most popular trails are regularly trampled down but you may be forced to break your own trail which means having a proper map, GPS coordinates, and route-finding skills. Caltopo and Gaia are great resources for downloading maps and using them offline. I personally use Gaia and have had only positive experiences using the app!
If you are planning your first winter camping trip and feeling a little apprehensive about it, I would recommend choosing a location that isn’t too far from the car, so should you absolutely hate it you don’t have far to hike if you want to bail. Also, I would suggest making sure the weather forecast is as favorable as possible.
For Alex’s and my second winter camping trip we decided to head to Mt. Rainier. The park was forecasted to get just 3 inches of snow and we thought “that shouldn’t be too bad”, well we ended up getting a foot of fresh snow overnight! We had to constantly shake the accumulated snow off the tent and the hike back to the car was rough as we had to break trail through a foot of fresh powder. The experience was so miserable at the time that we almost didn’t go again after that. So don’t make that mistake! Check the forecast and make sure the wind is calm, temperatures are reasonable, and there is zero precipitation in the forecast.
HUMAN WASTE
Another thing to keep in mind is what to do with human waste. While cat holes are typically the rule of thumb in the summer (although, not always), in the winter you cannot dig a hole since the ground is buried under so much snow. In the winter you must use blue bags to pack out your waste.

- TIPS FOR STAYING WARM -
One of the first questions people ask me when I say I camp in the winter is, “but how do you stay warm?!” To be honest, I shift my expectations. I understand and accept that I will likely be cold and uncomfortable for some moments in the backcountry. Winter camping isn’t ever going to be a cozy night in a cabin, sipping hot cocoa next to a roaring fireplace, but it is remarkably beautiful and something I will continue to do. Here are a few tips I have for making sure your winter camping trip isn’t downright miserable:
The hot water bottle trick - Before going to bed, boil a liter of water and then pour it into your Nalgene (metal water bottles will not work), screw the cap on tight and double-check to make sure there are no leaks. Now go to sleep with it! I like putting it between my legs, with the hopes that the water will warm the blood in my femoral arteries before it is pumped around my body.
Exercise before bed - Likely the last thing you want to do after a strenuous day of hiking is yet more exercise but doing some jumping jacks or running in circles around the tent will get your blood pumping. If you quickly get into your sleeping bag your body will retain the warmth before it can escape.
Eat snacks - Your body naturally generates heat as it digests, if you eat a snack before heading to bed your body will begin to digest as you are going to sleep, keeping you warm.
Use a foam sleeping pad as a cushion around camp so you don’t have to sit on rocks and/or snow and lose your body heat to the ground.
Keep your boots inside your tent at night so they are a little less cold the next morning. Also, before putting your boots on breathe into them. Your breath is warm and will be able to make your boots feel incrementally warmer, and every little bit helps when it’s a cold morning!
Keep your electronics and batteries warm by sleeping with them. Make sure you don’t forget the battery that is in the camera!
Don’t over-layer when you go to sleep. It’s intuitive to want to wear ALL your layers when you get into your sleeping bag at night, however, sleeping bags keep you warm by reflecting your own body heat back to you. If you wear too many layers your heat can’t escape and the sleeping bag won’t work properly. I sleep in long underwear and wool socks. If I wake up cold in the night I will add my fleece jacket.
Disclosure: This blog post contains affiliate links meaning, at no additional cost to you, if you click them and make a purchase I will receive a small commission.